Vision Board Maker: Build a Board with Clear Next Steps
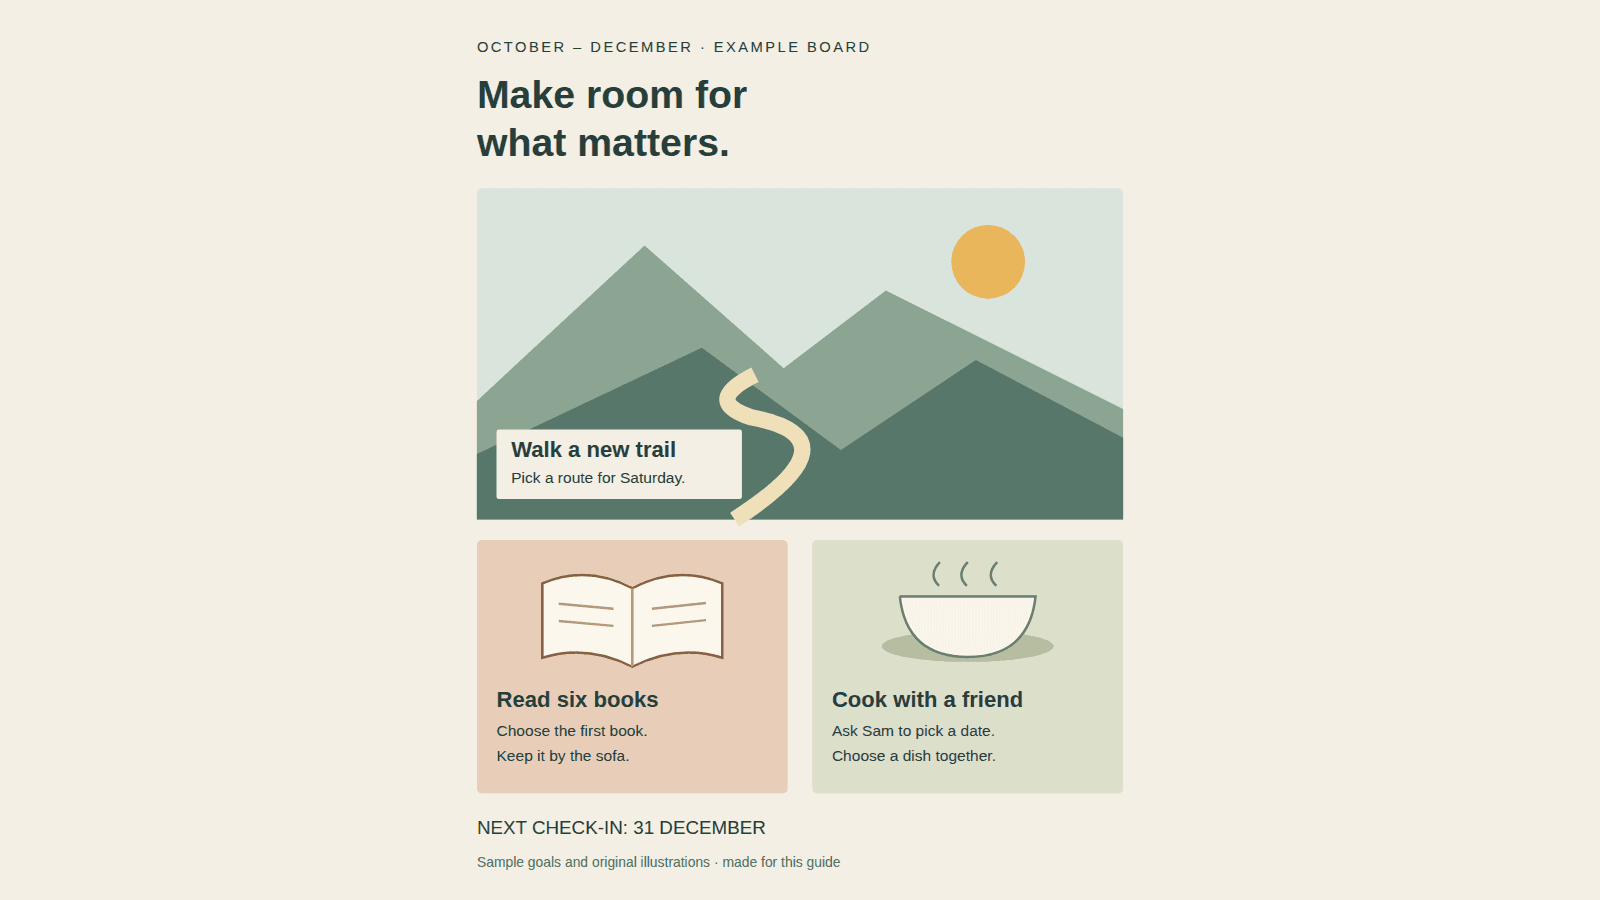
A vision board maker lets you place pictures and words on one page. Start with a few goals you care about, then give each one a picture and a small next step. The board below shows how that can look.
You can follow this guide in a design tool that lets you add images and text. Gather your pictures first. Use photos you own or images you have permission to use.
A finished vision board you can use as a guide
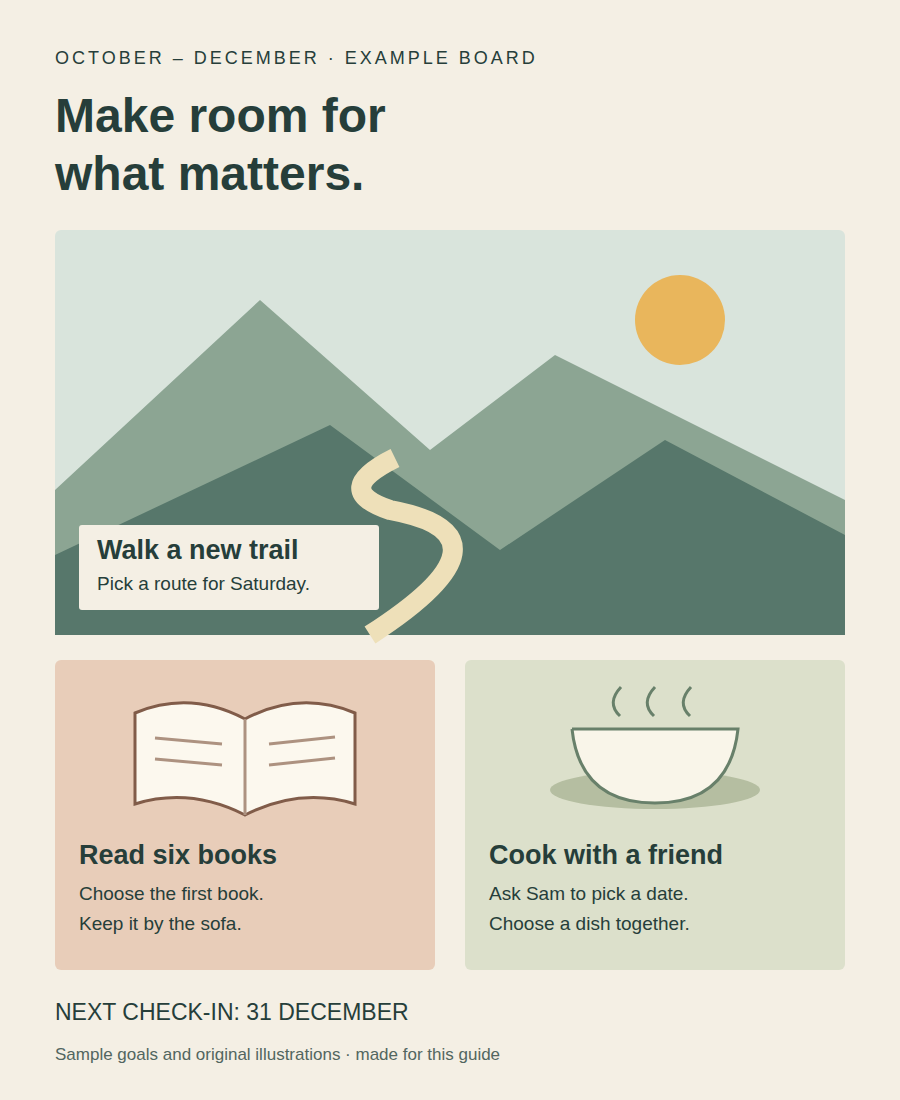
Open the full-size example board.
Original illustrated example made for this guide. These are sample goals, not a personal account or a screenshot from MyScrapBook Studio.
The board covers October to December. It has one large picture for the main goal and two smaller pictures below it. Each goal has a next step:
- Walk a new trail: pick a route for Saturday.
- Read six books: choose the first book and keep it by the sofa.
- Cook with a friend: ask Sam to pick a date, then choose a dish together.
The goals and names are examples. Replace them with your own. Three goals give this board room for words you can read; three is a design choice, not a rule for every board.
Build your board in five steps
1. Choose what this board is for
Pick a period or project, such as the next three months or a move to a new home. Write that scope at the top of your page.
Then write your goals on a short list. For each one, add a small action you can take next. If the goal is “more time outside”, the action could be “choose a walk for Saturday”. You are ready to move on when each goal has an action beside it.
2. Choose a picture for each goal
Use a picture that helps you recognise the goal. A photo of a local path might stand for more walks. A book cover might stand for a reading goal. You can use simple drawings, as this example does.
Put the pictures in one folder so they are easy to find. Keep the list of goals beside them. You do not need to fill the page with more pictures than your goals need.
3. Lay out the pictures before adding words
Choose where you want to view the board. A tall page can suit a phone; a wide page can suit a computer screen. Check your device's screen shape before choosing the page size. There is no single size that fits every phone.
For the layout shown here, put the main picture across the upper half of the board. Put the two smaller pictures side by side beneath it. Leave a clear strip above the pictures for a title.
If your tool lets you move and resize images, adjust them until none covers another goal. For more ways to arrange a page, see our guide to scrapbook layouts.
4. Add the goal and its next step
Place each goal beside its picture. Put the next action below it in smaller text. Keep the words on a plain patch of colour so they are easy to read.
In the example, the trail picture has a cream label: “Walk a new trail” and “Pick a route for Saturday.” The books and food have their own labels. You should be able to tell which action belongs to which picture without tracing a line across the page.
View the whole board at the size you plan to use it. If the words look too small, make them larger or cut extra words. Our colour palette guide can help you choose a small set of colours.
5. Save the board and check the result
Use your tool's save option to keep a version you can edit. If it offers an image download, open that file and check that all the pictures and words are there. Saving a project and downloading an image may be separate actions.
If you use the image as wallpaper, check the preview before you apply it. The clock or screen crop may hide a goal. Move important words away from those areas in your source board, then save a new image.
Add a date to review the board. When that date comes, keep the goals that still fit and change the rest. The example uses 31 December; choose a date that suits your plans.
Check the maker before you commit to it
Before building the full board, try one picture and one line of text. Check whether you can move them, save the project and open it again. If you need a wallpaper file, check the download options and any cost before adding the rest.
MyScrapBook Studio is our browser-based scrapbook app. Open the editor to try a page with pictures and words. You will need to sign in or create an account. You can browse the public How-To Library first.
For a phone wallpaper, check the app's current page-size and image-download options before you build the board.
Related Kits
Kits from creators in our marketplace that match this article.
Related guides
Digital Recipe Book: Keep Family Recipes and Handwriting
Make a digital recipe book from family cards and notes. Compare recipe apps with page design, plan your first page, and check the file before sharing.
Yearbook Maker: 6 Free Online Tools Compared for 2026
Choosing a yearbook maker in 2026? We compare six online tools on price, templates, collaboration and printing so your committee can start this week.
How to Make a Virtual Scrapbook Free in Your Browser (2026)
A virtual scrapbook is a photo album you build on screen. How to make one free in your browser in 10 minutes, plus which tool fits your project.
How to Make a Digital Memory Book: 5 Tools for 2026
A digital memory book keeps photos, stories and voices in one place. Here are the 5 tools worth using in 2026 and how to build one in an afternoon.