Travel Scrapbook Maker: Plan Your First Trip Page
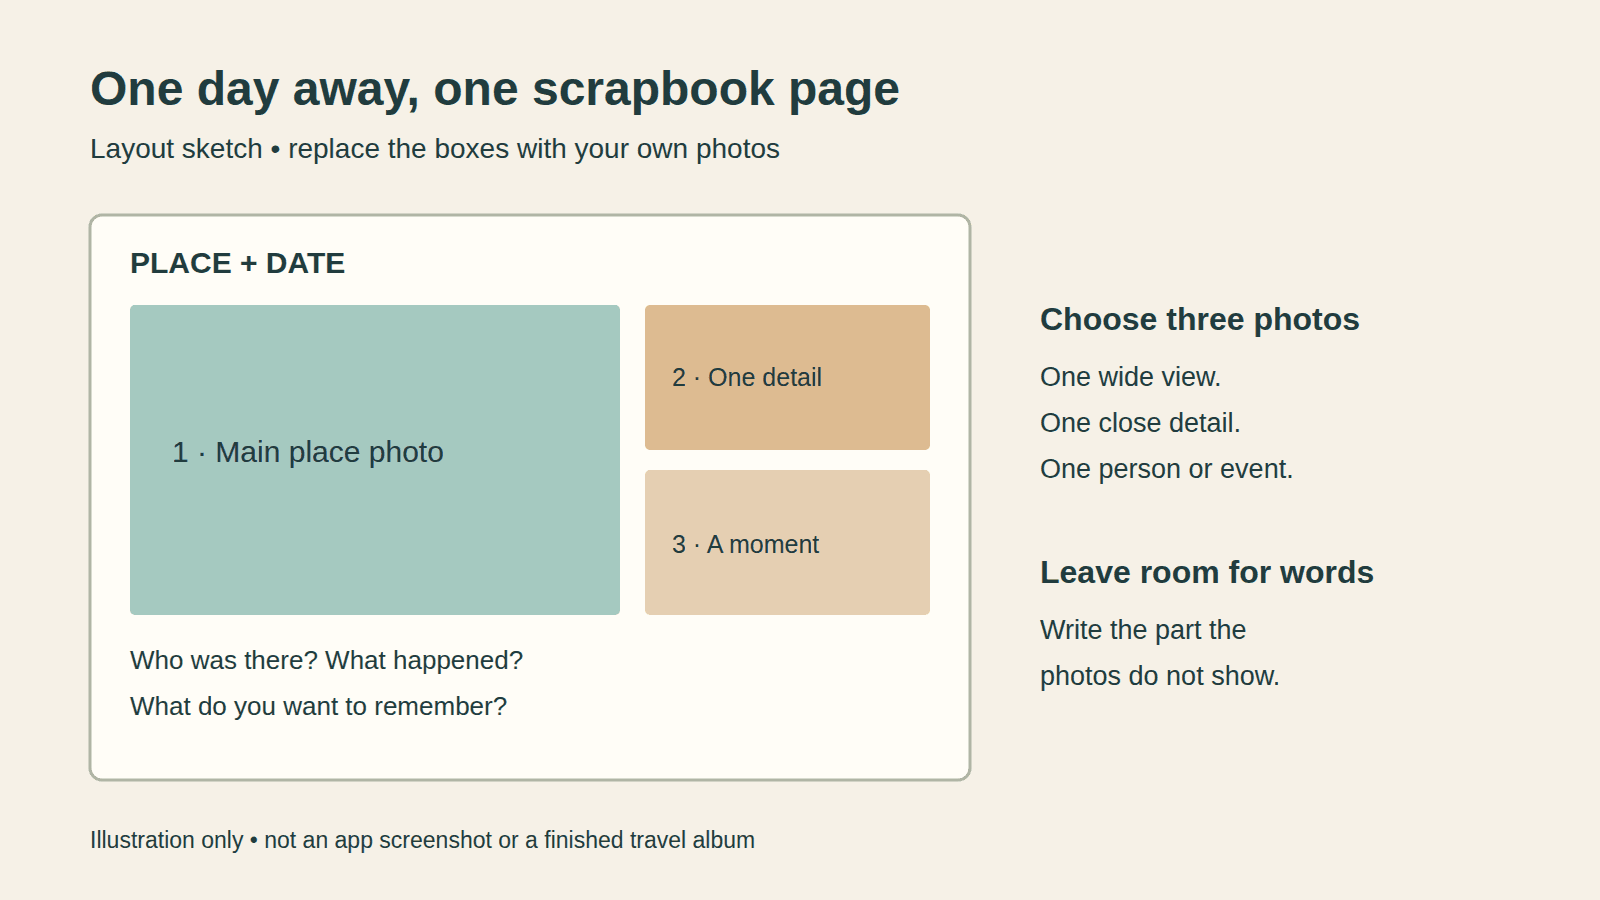
To start with a travel scrapbook maker, choose one day from your trip, three photos, and a short note about what happened. Put the place and date at the top. Make one photo large, place two smaller photos beside it, and leave space for your note below.
You can use MyScrapBook Studio to arrange photos and text on a digital page. You will need to sign in or create an account. Open the editor to reach the sign-in page and begin. Keep this guide beside you while you plan the page. The layout below is a suggested design, not a built-in travel template.
Pick one day before you pick a design
Start with a small part of the trip: a walk, a train ride, a meal, or an afternoon at the beach. Give the page a working title such as “Our first day by the sea.” You can change it later.
Make a folder for the photos you want to use. Copy your chosen files into it and keep the originals. If your photos are still on your phone, get copies onto the device where you plan to make the page first.
For this page, choose:
- A place photo: a wide view that shows where you were.
- A detail photo: a sign, a meal, a doorway, or another small part of the day.
- A moment photo: someone doing something, or a scene tied to your story.
These are prompts, not rules. If you only have one photo worth using, make it large and use the spare space for words. Do not add two weak photos just to fill the boxes.
Give each photo a place
Use the sketch as a plan for where each part will go. Keep the title above the photos and the note below them. Place the main photo on the left and stack the two smaller ones on the right.
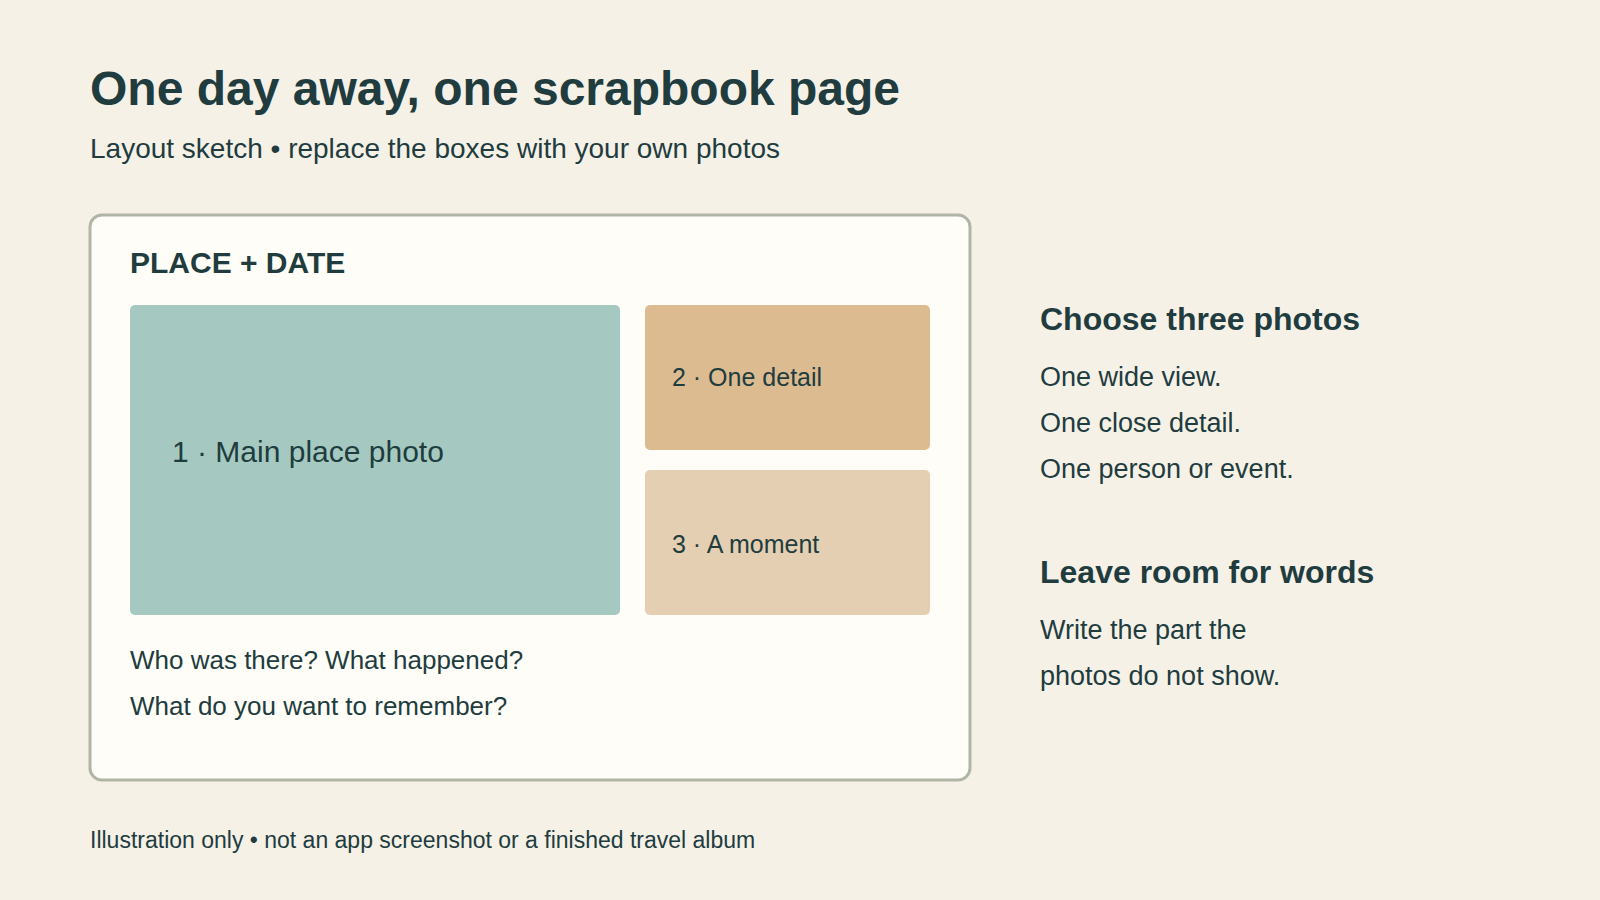
Illustration only: replace the boxes with your own photos. This is not an app screenshot or a finished travel album.
Try the photos before you add borders or stamps. Keep faces and key details in view when you crop. If the tall photo loses too much in a wide space, swap its place with another photo or change the shape of the space.
Leave a gap between photos so each one has a clear edge. Use the same gap on both sides of the small photos. You do not need to measure it exactly; step back and check whether one gap looks much wider than the rest.
For other arrangements, see the scrapbook page layout guide. Keep this trip page focused on one event, even if you choose a different design.
Write the part the photos do not show
Add the place, date, and names you want to remember. Then write two or three sentences about the day. Start with these questions:
- Why did you stop here?
- What happened just before or after the photo?
- Which small detail would you tell a friend?
Here is a made-up caption to show the shape of a note:
We took the early ferry and ate lunch near the harbour. The wind kept lifting the map, so we held it down with our cups. The photo shows the view from our table.
Use your own facts in place of the example. If you cannot recall the date, use the month or season you do know. Leave a name out until you can check it, rather than guessing.
Read the note next to the photos. If it only says what is already plain in the image, add one detail about the people or the day. If it tells a story from another day, save that part for a second page.
Choose travel details after the photos fit
Pick one background colour from a photo, then try a plain area behind your words. Check that you can read the note without zooming in. If a pattern makes the words hard to see, move the note onto a plain block.
For a city trip, you could add a stamp near the title or in an empty corner. The Urban Travel Vintage Stamps listing is one place to look. Read the listing's contents, file details, price, and licence before choosing a kit. The sketch above does not include that product.
Keep the photos as the main part of the page. If an extra covers a face, a date, or a word, move it or leave it out. A ticket or map from your trip can also be a useful detail; use your own image and check it before sharing.
Do not put booking codes, addresses, or other details you want to keep private on a page you plan to share. Crop those details from the copy you use in the design.
Check one page before you start the whole album
Read the page from top to bottom. Can someone tell where you went, who was there, and why this day mattered? Check names and dates against your own notes or files.
Then check the page in the form you intend to use. If you want an image file, check the editor's current export options and open a saved test file. If you want a printed book, check your chosen printer's page size and file rules before making the rest of the album.
Once you have checked that first page, plan the next few titles in a note. You might use one page per day, one per place, or one per event. Skip days with little you want to include. There is no need to give each day the same amount of space.
If you are still choosing a tool, the digital scrapbooking app guide covers different ways to make pages. If you are ready to begin, choose the three photos for your first day and open MyScrapBook Studio.
Related Kits
Kits from creators in our marketplace that match this article.
Related guides
Vision Board Maker: Build a Digital Board in 15 Minutes
A vision board maker turns vague goals into a board you actually look at. Compare 5 free tools, then build your own digital board in 15 minutes.
Digital Recipe Book: 5 Tools Tested for Family Recipes
A digital recipe book is either a searchable app or a keepsake you design page by page. Here are five tools tested, and which job each one fits.
Yearbook Maker: 6 Free Online Tools Compared for 2026
Choosing a yearbook maker in 2026? We compare six online tools on price, templates, collaboration and printing so your committee can start this week.
How to Make a Virtual Scrapbook Free in Your Browser (2026)
A virtual scrapbook is a photo album you build on screen. How to make one free in your browser in 10 minutes, plus which tool fits your project.